
Vermont

I get asked, from time to time, what things I would recommend when visiting Vermont. Here's my list. I'll update it as I learn about new gems.

DNS for VMs

Previously we talked about using Vagrant at Fictive Kin and how we typically have many Virtual Machines (VMs) on the go at once.

Addressing each of these VMs with a real hostname was proving to be difficult. We couldn’t just use the IP addresses of the machines because they’re unreasonably hard to remember, and other problems like browser cookies don’t work properly.

In the past, I’ve managed this by editing my local /etc/hosts file (or the Windows equivalent, whatever that’s called now). Turns out this wasn’t ideal. If my hosts don’t sync up with my colleagues’ hosts, stuff (usually cookies) can go wrong, for example. Plus, I strongly believe in setting up an environment that can be managed remotely (when possible) so less-technical members of our team don’t find themselves toiling under the burden of managing an obscurely-formatted text file deep within the parts of their operating systems that they — in all fairness — shouldn’t touch. Oh, and you also can’t do wildcards there.

As I mentioned in a previous post, we have the great fortune of having all of our VM users conveniently on one operating system platform (Mac OS X), so this post will also focus there, but a similar strategy to this one could be used on Windows or Linux, without the shiny resolver bits — you’d just have to run all of your host’s DNS traffic through a VM-managed name resolver; and these other operating systems might have something similar to resolver that I simply haven’t been enlightened to, and surely someone will point out my error on Twitter or email (please).

The short version (which I just hinted at) is that we run a DNS server on our gateway VM (all of our users have one of these), and we instruct the workstation’s operating system to resolve certain TLDs via this VM’s IP address.

We set up the VM side of this with configuration management, in our Salt sates. Our specific implementation is a little too hacky to share (we have a custom Python script that loads hostname configuration from disk, running within systemd), but I’ve recently been tinkering with Dnsmasq, and we might roll that out in the non-distant future.

Let’s say you want to manage the .sean TLD. Let’s additionally say that you have an app called saxophone (on a VM at 192.168.222.16) and another called trombone (on 192.168.222.17), and you’d like to address these via URLs like https://saxophone.sean/ and https://trombone.sean/, respectively. Let’s also say that you might want to make sure that http://www.trombone.sean/ redirects to https on trombone.sean (without the www). Finally, let’s say that the saxophone app has many subdomains like blog.saxophone.sean, admin.saxophone.sean, cdn.saxophone.sean, etc. As you can see, we’re now out of one-liner territory in /etc/hosts. (Well, maybe a couple long lines.)

To configure the DNS-resolving VM (“gateway” for us), with Dnsmasq, the configuration lines would look something like this:

address=/.saxophone.sean/192.168.222.16
address=/.trombone.sean/192.168.222.17

You can test with:

$ dig +short @gateway.sean admin.saxophone.sean
192.168.222.16
$ dig +short @gateway.sean www.trombone.sean
192.168.222.17
$ dig +short @gateway.sean trombone.sean
192.168.222.17

Now we’ve got the VM side set up. How do we best instruct the OS to resolve the new (fake) sean TLD “properly”?

Mac OS X has a mechanism called resolver that allows us to choose specific DNS servers for specific TLDs, which is very convenient.

Again, the short version of this is that you’d add the following line to /etc/resolver/sean (assuming the gateway is on 192.168.222.2) on your workstation (not the VM):

nameserver 192.168.222.2

Once complete (and mDNSResponder has been reloaded), your computer will use the specified name server to resolve the .sean TLD.

The longer version is that I don’t want to burden my VM users (especially those who get nervous touching anything in /etc — and with good reason), with this additional bit of configuration, so we manage this in our Vagrantfile, directly. Here’s an excerpt (we use something other than sean, but this has been altered to be consistent with our examples):

# set up custom resolver
if !File.exist? '/etc/resolver/sean'
  puts "Need to add the .sean resolver. We'll need sudo for this."
  puts "This should only happen once."
  print "\a"
  puts `sudo sh -c 'if [ ! -d /etc/resolver ]; then mkdir /etc/resolver; fi; echo "nameserver 192.168.222.2" > /etc/resolver/san; killall -HUP mDNSResponder;'`
end

Then, when the day comes that we want to add a new app — call it trumpet — we can do all of it through configuration management from the ops side. We create the new VM in Salt, and the next time the user’s gateway is highstated (that is: the configuration management is applied), the Vagrantfile is altered, and the DNS resolver configuration on the gateway VM is changed. Once the user has done vagrant up trumpet, they should be good to point their browsers at https://trumpet.sean/. We don’t (specifically Vagrant doesn’t) even need sudo on the workstation after the initial setup.

SSH: jump servers, MFA, Salt, and advanced configuration

Let’s take a short break from our discussion of Vagrant to talk about how we use SSH in production at Fictive Kin.

Recently, I went on a working vacation to visit my family in New Brunswick (think: east of the eastern time zone in Canada). While there, I needed to log in to a few servers to check on a few processes. I’ve done this in past years, and am frequently away from my sort-of-static home IP address. Usually, this required wrangling of AWS EC2 Security Groups to temporarily allow access from my tethered connection (whose IP changes at least a few times a day), but not this time. This time things were different.

Over the past year or so, we’ve been reworking most of our production architecture. We’ve moved everything into VPC, reworked tests, made pools work within auto scale groups, and generally made things better. And one of the better things we’ve done is set up SSH to work through a jump host.

This is certainly not a new idea. I’ve used hosts like this for many years. Even the way we’ve set it up is far from groundbreaking, but I thought it was worth sharing, since I've had people ask me about it, and it’s much more secure.

The short version is that we’ve set up a SSH “jump” host to allow global SSH access on a non-standard port, and that host — in turn — allows us to access our AWS servers, including QA and production if access has been granted. There is no direct SSH access to any servers except the jump host(s), and they are set up to require multi-factor authentication (“MFA”) with Google’s Authenticator PAM module.

This is more secure because nearly none of our servers are listening on the public Internet for SSH connections, and our jump host(s) listens on a non-standard port. This helps prevent compromise from non-targetted attacks such as worms, script kiddies, IBR. Additionally the server is configured with a minimal set of services, contains no secrets, requires public keys (no passwords) to log in, has a limited set of accounts, harshly rate-limits failed connections, and has the aforementioned MFA module set up, which we require our jump host users to set up.

In practice, this is pretty easy to set up and use, both from the server side and for our users.

From a user’s standpoint, we provision the account, including their public key, through configuration management (we use Salt). They then need to SSH directly to the jump host one time to configure google-authenticator, which asks a few questions, generates a TOTP seed/key, and gives the user a QR code (or seed codes) that they can scan into their MFA app of choice. We have users on the Google Authenticator app (both Android and iOS), as well as 1Password (which we acknowledge is not actually MFA, but it’s still better than single-factor).

Then, when they want to connect to a server in AWS, they connect via ssh — using their SSH private key — through the jump host (which asks for their current rotating TOTP/MFA code), and if successful allows them to proxy off to their desired server (which also requires their private key, but this is usually transparent to users).

To illustrate, let’s say a user (sean) wants to connect to their app’s QA server (exampleappqa01.internal.example.net, which is in a VPC that has a CIDR of 10.77/16, or has IP addresses in the 10.77.* range). If they have their SSH configuration file set up properly, they can issue a command that looks like it’s connecting directly:

~$ ssh exampleappqa01.internal.example.net
Authenticated with partial success.
Verification code: XXXXXX

sean@exampleappqa01:~$

This magic is possible through SSH’s ProxyCommand configuration directive. Here’s a sample configuration for internal.example.net:

# jump host ; used for connecting directly to the jump host
Host jumphost01.public.example.net
  ForwardAgent yes
  Port 11122  # non-standard port

# for hosts such as test.internal.example.net, through jumphost01
Host *.internal.example.net
  ForwardAgent yes
  ProxyCommand nohup ssh -p 11122 %r@jumphost01.public.example.net nc -w1 %h %p

# internal IP addresses for internal.example.net
Host 10.77.*
  ForwardAgent yes
  ProxyCommand nohup ssh -p 11122 %r@jumphost01.public.example.net nc -w1 %h %p

SSH transparently connects (via ssh) to the non-standard port (11122) on jumphost01.public.example.net and invokes nc (netcat — look it up if you’re unfamiliar, and you’re welcome! (-: ) to proxy the connection’s stream over to the actual host (%h) specified on the command line.

Hope that all made sense. Please hit me up on Twitter (or email) if not.

Here are a couple bonus scenes for reading this far. Our Salt state for installing Google Authenticator’s PAM module looks like this, on Debian:

include:
    - apt  # for backports
    - sshd-mfa.openssh  # for an updated version of sshd

libqrencode3:
    pkg.installed

libpam-google-authenticator:
    pkg.installed:
        # from http://ftp.us.debian.org/debian/pool/main/g/google-authenticator/libpam-google-authenticator_20130529-2_amd64.deb
        - name: libpam-google-authenticator
        - require:
            - pkg: libqrencode3

# see: http://delyan.me/securing-ssh-with-totp/
# nullok means that users without a ~/.google_authenticator will be
# allowed in without MFA; it's opt-in
# additionally, the user needs to log in to run `google-authenticator`
# before they'd have a configured MFA app/token anyway
/etc/pam.d/sshd:
    file.replace:
        - pattern: '^@include common-auth$'
        - repl: |
            auth [success=done new_authtok_reqd=done default=die] pam_google_authenticator.so nullok
            @include common-auth # modified
        - require:
            - pkg: libpam-google-authenticator
        - watch_in:
            - service: openssh6.7

/etc/ssh/sshd_config:
    file.replace:
        - pattern: 'ChallengeResponseAuthentication no'
        - repl: |
            ChallengeResponseAuthentication yes
            AuthenticationMethods publickey,keyboard-interactive:pam
        - append_if_not_found: True
        - watch_in:
            - service: openssh6.7

Finally, on this topic: I’ve been playing with assh to help manage my ssh config file, and it’s been working out pretty well. I suggest you give it a look.

Vagrant: Bootstrapping

In a previous post, we talked about why we use virtual machines, and Vagrant, at Fictive Kin. Now let’s get to how we do it.

If you’re familiar with Virtual Machine based development environments that are set up through a configuration management (we use Salt, but you could use something different like Ansible, Puppet, Chef, etc.), this probably won’t seem all that new to you, but there are a few things that we do — possibly uniquely — that might help with your systems.

One thing that I didn’t mention on the previous post is that we’re a bit unlike many other startup kind of shops where developers and other team members (I’m going to just say “developers” to mean all team members from now on, for simplicity) focus on a single, large project. We have large projects, of course, but we tend to work on many of them at once. This doesn’t necessarily mean that each developer will be working on multiple projects at once, but our team — as a whole — will certainly need to be able to pull up access to several projects at the same time.

We’ve experimented with a monolithic VM (each developer gets one large VM that runs all active projects on the same operating system and virtual instance), but we found that it was both too large (and therefore more complicated, more prone to failure) for most of our developers, and too hard to maintain. Sometimes different projects required different versions of the same RDBMS, for example, and that’s much easier if there’s only one version running. Or, more precisely: one version per virtual machine. Splitting apps onto their own VMs like this also reduces (but certainly far from eliminates) the headaches associated with deploying apps on different platforms — Mined runs our regular Python + Flask + Postgres stack, but Teuxdeux is a Ruby + Sinatra + MySQL app. Technically, these two apps could run on the same VM, but we’ve learned that it’s best to keep them separated.

So, we give our developers a set of VMs — generally one per project or app. This not only separates concerns for things like database server versions, but also keeps one failing app from trampling on the others, for the most part. Luckily, Vagrant has good support for commanding multiple virtual machines from the same Vagrantfile.

In addition to one VM per app, each developer has a primary VM called gateway that we use for shared infrastructure, such as DNS resolution (more on this in a later post), caching (we use Apt-Cacher NG to avoid downloading the same Debian packages on each VM), and Vagrantfile management.

We also use the same “Vagrant Box” (base image file) for each of our VMs, and this image closely matches the base image (EBS-backed AMIs) we use on AWS. (I’ve been tempted to move to an app-specific image model for production, but for now we use nearly the same image everywhere, and we’d continue to do so for the VMs… and since this post is about the VMs, let’s just ignore the future-production parts for now.)

That was more background information than I intended to share, but I do think it’s important. Let’s get on to a practical example workflow of how we’d get a new developer up and running on their new VMs.

The first two steps are: install VirtualBox and install Vagrant. We’re lucky enough to have all of our developers’ workstations on the same operating system (Mac OS X), so these steps — and a few other things we do — are relatively simple.

Next, we have a developer (in their shell) create a new directory, cd into that directory and download a simple “bootstrapping” Vagrantfile, which (essentially) looks like this:

# -*- mode: ruby -*-
# vi: set ft=ruby :

VMNAME=ENV.fetch('VM_NAME', false)

unless VMNAME
  abort("You must set env[VM_NAME]")
end

VAGRANTFILE_API_VERSION = "2"

def bootstrap(vm)

  # common base box
  vm.box_url = "http://example.com/path/to/fk-vm-versionnumber.box"
  vm.box = "fk-vm-versionnumber"

  # remove default minion_id stuff; provision default minion file
  # the base image has a minion id of "UNCONFIGURED"
  vm.provision :shell,
    :inline => 'if [ "`cat /etc/salt/minion_id`" == "UNCONFIGURED" ]; then
    systemctl stop salt-minion
    rm -rf /etc/salt/minion_id /etc/salt/pki/minion;
    cat > /etc/salt/minion<<EOF
    master: saltmaster.example.com
    master_port: 12345
    grains:
        env: development
EOF
    systemctl start salt-minion
fi
'

end

Vagrant.configure(VAGRANTFILE_API_VERSION) do |config|

  config.vm.define :gateway, primary: true do |config|
    # bootstrap (common code; salt installer)
    bootstrap config.vm

    # host, network
    config.vm.host_name = "#{VMNAME}.gateway.example.net"
    config.vm.network "private_network", ip: "172.31.2.2"

    config.vm.provider "virtualbox" do |v|
      v.customize ["modifyvm", :id, "--memory", 128]
    end

  end

end

If you’re already familiar with Vagrant, then most of this could be similar to what you might use, yourself. Possibly with the exception of the VM_NAME bits. You’ll probably also notice that this Vagrantfile only configures one VM, and not the set of VMs (one per app) that’s described above.

Once our developer has this bootstrapping Vagrantfile, we assign them a “VM Name”, which for the most part is our developer’s first name — mine is sean, so we’ll use that as our example — and have them run the following command:

VM_NAME=sean vagrant up

This boots up the developer’s gateway VM for the first time, as sean.gateway.example.net (we have a domain name that we use instead of example.net), and once it’s running, Vagrant executes the inline provisioning script that’s in the Vagrantfile above.

This provisioning script sets the VM’s Salt minion (the “Salt Minion” is the agent that runs on the “client” machine and connects to a “Salt Master” to get configuration management instructions and data) ID to sean.gateway.example.net, and configures the minion. It then starts the minion, which connects to our public Salt Master (saltmaster.example.com:12345 in our example).

Once the VM is connected, someone from our ops team uses SSH to connect (through our jumphost — more on this later, too) to the saltmaster and manually verifies the key and approves/signs the sean.gateway.example.net credentials.

(There’s a small opportunity for someone to spoof the same name that the VM is using and have our administrator mistakenly approve the wrong key (with the same name), but salt-key showing two sets of credentials with the same name (or a rejected set) would be suspicious enough to halt this process… and Salt administration is a topic for another day.)

After approving the developer’s gateway VM, the administrator proceeds to “highstate” (effectively: apply the defined configuration management to) the VM. This step installs the required software on the gateway VM, such as the aforementioned Apt-Cacher NG.

Here’s the key to our bootsrapping strategy: one of the bits of managed configuration is a templated /vagrant/Vagrantfile. This means that the Vagrantfile is managed by our configuration management system, and can be updated on the developer’s workstation.

We (ops) intentionally can’t reach into a directory higher than the one containing the Vagrantfile, but this directory is — by default — mounted at /vagrant on the VMs. Vagrant takes care of managing this mount within our VMs, so each VM in our set has access to /vagrant, which is the same directory that contains the Vagrantfile — pretty convenient!

Configuration management alters the Vagrantfile to contain not only an updated configuration for the gateway VM, but it also provisions the other VM configurations into the Vagrantfile, so once it’s complete, all a developer needs to do to work on another VM (such as our Mined app) is to vagrant up mined. The developer no longer even needs to set VM_NAME in the environment because we’ve captured that through the first gateway boot, and Salt wrote it directly to the Vagrantfile. Ops doesn’t even need to log into the saltmaster host to approve new keys for this additional VM, and I intend to write about this part, too.

This has been a relatively long post, but I think you’ll see that managing the Vagrantfile with Salt (or another config management platform) is pretty easy, and it greatly simplifies the burden on our developers (which might not be very skilled in system management).

In future posts, we’ll talk a bit more about some of the other Vagrantfile customizations that I hinted at, that help our VMs shine.

Vagrant: Why?

In a previous post, I mentioned that we — at Fictive Kin — over the past several years have managed to build a development environment that works pretty well, and that I’m proud of.

When (if) everything is working properly, we can get a new team member — even one with little technical knowledge (though indeed a small amount is required) — up and running on a development environment within a few minutes.

This dev setup mirrors our other environments (qa + staging, production) as closely as possible. Core to my devops philosophy is that you should be working in the same configuration as where you deploy (again, with a few only-if-necessary changes).

When things go wrong on production, they can be a huge pain to debug. Having a production setup with different paths, different sets of libraries/environments, or even a different operating system to what developers, designers, managers, and QA folks are using is just asking for trouble.

In the past, I’ve worked on apps that had no “official” development environment. Developers were expected to set up the app on their own, usually without much in the way of instruction or documentation. Developers sometimes like this — we tend to like to do things our own way — but I’ve learned that while it might be convenient for development, it can be disastrous for production. What if the developer installs a very different version of the RDBMS (database) software? What if they’re using / to denote paths when they should be using \? Or if their workstation has a case-insensitive filesystem, but production’s filesystem (correctly) matches case? What if they’ve got the wrong, incompatible version of a library/package installed, or — worse yet — a completely different version of PHP, Python, Node, or Ruby?

Even if everything goes well and the developer sets up their environment perfectly, there is a time penalty to this. I was once on a client contract at a very high per-hour rate and needed to spend almost two days setting up my (their) environment — which I was still not sure was correct — needlessly costing our client what might have been thousands of dollars, instead of being able to immediately focus on the project at hand.

The process of getting team members up and running on a functional development environment can be painful. Especially if your team is remote and can’t always easily have someone inspect broken setups… or if members spend a lot of time travelling and are not always blessed with reliable, always-on Internet connections, making cloud-based development setups impractical.

Our core values for this kind of setup are relatively simple in idea, but not always so in practice. They’ve changed a bit over time, but here are a few that spring to memory:

  • should be quick and easy to set up
  • shouldn’t require much technical knowledge beyond the ability to install some packaged software and navigate some simple commands (cd, mkdir, ls) in Terminal
  • must be able to be managed remotely, when online, so ops can patch security problems and make architectural changes — even if this management is invoked by the user
  • must mirror production as closely as possible
  • can require an Internet connection to get up and running, but then should work offline (such as on an airplane) whenever the app allows
  • must keep the app separated from other apps/development, and must be secure when the hosting workstation joins an untrusted network
  • joins a VPN so other peers/team members can be invited to “take a look at my VM to see what I’m working on”
  • actively prevents unskilled team members from making mistakes that could trickle into production, such as installing incorrect versions of libraries

There are many other things that our development environments do, but I believe these to be the most important.

To accomplish this, we use Vagrant, VirtualBox, Debian Linux, Salt, our app stack, and many other parts that we’ll avoid for the purposes of this article. Vagrant and VirtualBox allow us to run “virtual machine” computers within our main workstations.

On production we also use Debian and Salt plus our app stack and the other bits. Instead of Vagrant + VirtualBox, we deploy in AWS EC2. But as mentioned above: our development stack mirrors production as closely as possible.

I’m sure this practice matches what some of you already so. Others might use a containerized system (such as Docker). We don’t deploy on Docker, so we also don’t develop on Docker. Maybe one day we will deploy on Docker. At which time, we’ll find a way to make our development environments use/simulate this.

Still, others of you may develop directly on your workstations. Perhaps a Mac running the stock Apache + PHP, or a Windows box with Python and a dev server listening directly on a HTTP socket. I would discourage this, based on the above mantra of development-matches-production.

Worse yet, some of you may be developing and deploying applications by editing files on production servers, or uploading individual files, directly. Please don’t do this; it only leads to pain.

So, we’ve established some core guidelines, and a base set of software. In the next part, we’ll talk about how we (at Fictive Kin) bootstrap our development environment Virtual Machines.

Revitalization Project

It’s been over three years since I’ve posted anything new to my blog. This saddens me. I miss writing.

This is my own fault, of course, and there are reasons for my absence…

Part of it is shifting interests and altered career focus. I’m still working with Fictive Kin, but these days I’m doing almost no PHP, and I spend my days (and sometimes nights) with operations/systems administration. We’re doing really interesting stuff, and that occasionally leads down fun roads. For example, I’ve found time to write this while on my way to Korea to help lead a performance workshop. (I wrote this in May, but am only posting in August. So it goes.)

Another part of this site’s decay has now hopefully been resolved: a rusty and dusty server that I just couldn’t find the time and motivation to update. I (finally) recently moved this site to a cloud instance in EC2 (Amazon Web Services), off of a five-plus year old dedicated Ubuntu box hosted in downtown Montreal. I no longer need the server to be close, ping-wise, to me, and the lack of flexibility with dedicated hardware was becoming unbearable (as far as finding time to maintain it goes).

The new hosting setup much more closely matches what we do at work: Vagrant (for development), EC2, Route53, Salt, Python… and I’ve grown an appreciation for reducing cognitive load, so making things over here on the personal side work as closely as possible to things on the professional side is highly beneficial to my ability to remember things and fix problems.

Python, you say? Yep.

At work, we’ve moved most of our efforts to Python (Flask-based, but with a built-up library of custom code that helps us build new apps quickly). Despite my membership in its Cabal (developers/leadership), I hadn’t maintained the Habari install on this site for years (and hey… it still wasn’t exploited-in-minutes, Wordpress style, so good for us). I have also fostered an increasing appreciation for simplicity and reliability over the years, and wanted to move to a static (generated) platform. I found Nikola. It met my needs, and was familiar (Jinja, relatively clear Python), so I moved this site off of Habari and Lithium.

Some stuff isn’t yet ported (namely: my brewing recipes), and some things were simply removed (comments are gone, removed some irrelevant posts, and I didn’t feel the need port over some of my pages), but I did manage to update my shares page… finally.

There are a few things that we’ve built that I’m partcularly proud of. One of those is our development setup. It’s been an iterative process, and one that was not without failure, but I’m happy to say that after over six years, we’re finally at a place where I consider our development setup to be both reliable and stable. Well, as reliable and stable as software is expected to be, at least.

The short version is that we use Vagrant, VirtualBox, Salt, and a whole bunch of other pieces to mimic as-close-to-production-as-possible development environments for our users that — when things are working properly — can be set up in a few minutes, can be added to a new project or new app without much technical knowledge on the user side, and can — for the most part — be maintained, debugged, and repaired remotely, without having much control over the host machine (by design). (We’re a fully distributed team, so this last part is critical.)

I’ll be writing about a few of the tricks/tips/ideas we’ve learned on this journey, here, as well as some other infrastructure that helps with operations. Hopefully I haven’t ignored this site so long that I’ve lost my entire readership. (-:

I know I said it earlier, but I really do miss writing, and I miss the community of bloggers we once had in web development. We’ve let it become diluted with micro-posts, giving away our content to proprietary services, being perpetually insulted/insulting, slacktivism, word policing, and petty bickering. Is there ever hope of returning to something less pedestrian, less… juvenile? I sure hope so.

Affirmative Wager

There’s a very risky — but important — conversation that takes place in our community from time to time. It’s about gender and sexism. To be honest, I’m scared to write about this for fear that something I say might be twisted into a derogatory opinion that is not representative of the way I actually think and feel.

I put this on Twitter, a while back:

That said, I do have something to say, and I haven’t heard anyone else make this point, so I suppose I should step up and say it.

When Chris and I select potential writers for Web Advent, we make a conscious decision to approach women who we think would do a good job. I also admit to doing this in the past when my role was to select conference speakers.

To be clear, I’m not a fan of affirmative action — far from it. Sure, I’m a caucasian male, and I’m not so naïve as to think that there’s not a certain amount of unrequested privilege that comes with being born into this body, but I also strongly believe in the benefits of meritocracy — especially in online communities. (Note from future Sean: I'm less and less convinced about the meritocracy…)

Naïvety aside, I’ve worked to get where I am today, and I will keep working to advance further. When the opportunity presented itself (due to previous hard work), I moved to Montreal with barely two weeks’ salary in the bank, and decided to work at advancing to the top tier in our field. When I first met Kevin Yank, and saw what he’d accomplished with his first book, I was motivated to get involved in the more-public side of our community: writing, getting involved with PHP documentation, and speaking at conferences. I grew up in a relatively small city, in a timezone that most of you probably don’t even know exists (one hour ahead of America/New_York), where there was little opportunity to survive, let alone advance. I’m even horribly under-educated.

I mention these things not to glorify my own accomplishments, but to illustrate my strong belief that people should be recognized for their contributions and their abilities, not for their race, gender, financial background, or most other reasons.

So, I think that people should earn their place, and yet I make a determined effort to seek out female contributors. Sounds like a paradox. I’m not much of a fan of those.

I have a theory about this. I hope I’m right, but I’m open to the idea that I might not be. My theory goes like this:

The women who have advanced in our community, and have overcome the hardships that are inherent to being in such a minority, almost certainly function at a higher level than the average community member.

That is to say that — in my experience, and anecdotally — most of the women who survive in our community are exceptional members of our community. They are very good at what they do, and they are (likely uncoincidentally) some of my favourite people.

This theory tidily resolves the aforementioned paradox in my logic, and — to me at least — is evidence for why we ought to make an affirmative wager (hat tip to Pascal) in giving women a fair chance (in an often-unfair environment) when making event/opportunity selections, and why more women should be encouraged to participate in the present and future development of how the community operates.

…at least until the gender imbalance is a thing of the past.

Web developer

Over the weekend, I saw a discussion on Twitter about a particular developer who is worried about his future as PHP becomes less the de facto platform for all web development, and he moves to other technologies. (These are my words, and my interpretation, not his.)

This got me thinking about how I’ve recently gone through a similar change in how I think about my own career, and how I was in a similar place for a long time.

I’ve been doing PHP for a really long time — I remember toying with it in 1999, and I started working with it professionally, after stints with Perl and ColdFusion (laugh it up), in 2001. I have this theory that almost everyone who was doing web stuff before the dot-com bubble burst, and stuck to it, is probably a decent (or better) developer today. Anyway… for a long time, I considered myself a PHP developer. I even fought somewhat-zealous, and somewhat-religious platform/language wars when one company I worked at decided (and ultimately failed) to move to J2EE.

At work, we deploy code on many platforms. We’ve got PHP, Python, JavaScript, Ruby, and even Erlang in production. We’re targetting Python and Flask for new projects, so we’re all on the same page.

This weekend’s conversation revived some thoughts I’ve been mulling over for a really long time. I no longer consider myself a PHP developer. Sure, the vast majority of my actual platform experience is in PHP, but I’d prefer to think of myself (and of good web developers in general) as simply a web developer.

The reason for this change lies in the fundamentals of the work we do. I’ve realized that it’s the hard parts that matter, not a language’s syntax or frameworks. The hard parts are things like security, architecture, HTTP, scalability, performance, optimization, debugging, and knowing how to identify problems. By comparison, syntax is the easy part.

For developers who are well-versed in these hard parts, working with a new platform is usually a matter of learning new tools, new methodologies, and new libraries. In my experience, there’s certainly a learning curve to these parts, but it only requires research and practice if you’re already good at the hard parts.

These hard parts are what separate great developers from amateur developers. Learning something like web security, solidly, takes potentially years of paranoid practice and review (even though the fundamentals are simple). Learning something like pip, gem or composer isn’t even in the same league of difficulty — especially if you’re familiar with the concepts of a similar tool on another platform.

So, experienced developer-friends who are already intimately familiar with one platform: fear not; the best of your skills are transferrable.

For those of you who might not be so experienced, I’ll make a recommendation: learn, practice, and find a mentor for the following; these skills are what I look for in colleagues.

HTTP
HTTP seems WAY easier than it is. I suppose that’s kind of the point, but in practice, HTTP will trip you up. It will find your code in a dark alley and do unspeakable things to its clients. For this reason, you must be prepared for battle by learning the gory details of cookies, sessions, headers, keep-alives, caching, proxies, and load-balancing. Really. It’s way harder than you think.
Security
The fundamentals of security are easy, but within these fundamentals lie an unimaginable amount of nuance. Learn about CORS, browser implementations, CSRF, XSS, header injection (well, actually, all types of injection), sandboxing, client security, mobile security, SSL/certificates, and databases.
Scaling
Scaling and performance are different things. In order for something to scale horizontally, some basic principles must be applied to your application. Learn about resource sharing, node isolation, sticky sessions, client-cookie-sessions, load balancing, data partitioning, sharding, and caching.
Debugging
One of my greatest skills as an experienced developer is being able to identify problems. These days, when I encounter a tough new problem, it usually reminds me of a problem I’ve experienced and worked around or fixed in the past. Sometimes, new problems just smell like old problems, and the path to a functioning system lies in the experience of fixing the old problems. This one is hard to learn independently, and comes with time. I once heard someone say that airline pilots don’t get paid a lot because of their regular day-to-day flights (where autopilot and assisted-landing do the majority of the work). They get paid a lot because the few times in their career when they need to make life-saving decisions in the middle of an emergency; the still-alive passengers might think it’s worth it to shell out a few bucks more than minimum wage.

TL;DR: don’t be a PHP/Python/Ruby/JavaScript/Logo/Erlang/ColdFusion/Perl/Scala/Go/Fancylang developer. Be a web developer. Learn your trade. Be an apprentice. Practice your trade.

MongoDB Elections

On Monday of this week, Amazon’s EC2 service suffered a major outage, which they call “performance issues”, which we all know is simply not true.

This is not a post about how Amazon has failed us. Everyone goes down. We use AWS because it’s flexible, and we need the flexibility. This is a post about how Gimme Bar went down due to this outage, despite our intentions of making everything resilient to these types of failures. It is a post about how I accidentally misconfigured our MongoDB Replica Set (“RS”).

When one of the us-east availability zones died (aside: this was us-east-1c on the Fictive Kin AWS account, but I’ve learned that the letter is assigned on a per-account basis, so you might have lost 1a, 1e etc.), I knew what was wrong with the RS right away. In talking this over with a few friends, it became clear that the way MongoDB elections take place can be confusing. I’ll describe our scenario, and hopefully that will serve as an example of how to not do things. I’ll also share how we fixed the problem.

Gimme Bar is powered by a three-node MongoDB replica set. A primary and a secondary, plus a voting-but-zero-prority delayed secondary. The two main nodes are nearly-identical, puppeted, and are in different Amazon AWS/EC2 Availability Zones (“AZ”). The delayed secondary actually runs on one of our web nodes. It serves as a mostly-hot “oops, we totally screwed up the data” failsafe, and is allowed to vote in RS elections, but it is not allowed to become primary, and the clients (API nodes) are configured to not read from it.

In the past, we did not have the delayed secondary. In fact, at one point, we had three main nodes in the cluster (a primary and two secondaries, all configured for reads (and writes to the primary) by the API nodes).

In order for MongoDB elections to work at all, you need at least three votes. Those votes need to be on separate networks in order for the election to work properly. I’ll get back to our specific configuration below, but first, let’s look at why you need at least three votes in three locations.

To examine the two-node, two-vote scenario, let’s say we have two hypothetical, identical (for practical values of “identical”) nodes in the RS, in two separate locations: Castle Black and Winterfell. Now, let’s say that there’s a network connection failure between these two cities. Because the nodes can’t see each other, they each think that the other node is down. This makes both nodes attempt an election, but they both destroy their own votes because there is not a majority. (A majority is ((“number of nodes” ÷ 2) + 1), or in this scenario: 2 nodes. The election fails, the nodes demote themselves to secondary, and your app goes down (because there’s no primary).

To solve this problem, you really need a third voting node in a third location: King’s Landing. Then, let’s say that Castle Black loses network connectivity. This means that King’s Landing and Winterfell can both vote, and they do because they have a majority. They come to a consensus and nominate Winterfell (or King’s Landing; it doesn’t matter) to be Primary, and you stay up. When Castle Black comes back online, it syncs, becomes a secondary, and the subjects rejoice.

MongoDB has non-data nodes (called arbiters). These can be helpful if you’re only running two MongoDB nodes, and don’t want to replicate your data to a third location. Imagine it’s really expensive to get data over the wall into King’s Landing, but you still want to use it to vote. You could place an arbiter there, and in the scenario above where Castle Rock loses connectivity, King’s Landing and Winterfell both vote. Since King’s Landing can’t become primary (it has no data), they both vote for Winterfell, and you stay up. When Castle Rock rejoins the continent, it syncs and becomes secondary… and the subjects rejoice.

So, back to Gimme Bar. In our old configuration, we had three (nearly) identical nodes in three AZs. When one went down, the other two would elect a primary, and our users never noticed (this is far better than rejoicing). At one point, we upgraded the memory on our database nodes, and realized that we really only needed one secondary (two nodes). As discussed above, we can’t run a RS with just two nodes, so we added an arbiter on one of our ops boxes, which was in a third AZ. We were still AZ-failure tolerant.

Then, at some point, we thought about the “Sean accidentally types db.users.remove() into a late-night console and the users do the opposite of rejoicing” scenario. Thus, we set up one of our web nodes to act as a delayed secondary, as described above. When we did this, we removed the now-redundant arbiter from the RS. We still had three votes in the RS, so all was good… right? Not exactly.

What we neglected to notice is that gbweb01 (where we set up the delayed secondary) was in the same AZ as gbdb03 (our priority Primary). This was, unfortunately, the same AZ that suffered performance issues on Monday. So, a majority of our voters (two of the three) were knocked out, and gbdb04 (normally our wired secondary) was unable to elect itself primary, so we went down. Luckily, so did about half of the Internet, so we were just noise in an otherwise-noisy Monday afternoon.

To solve the problem, after Amazon had mopped up its mess, I simply moved the delayed secondary to gbweb03 which is not in the same AZ as gbdb03 or gbdb04 and reconfigured the RS. Sync, secondary, three votes, and our cluster is happily redundant and AZ-fault-tolerant again. During the outage, I could also have just reconfigured the RS to give gbdb04 the only vote, thus forcing it to become primary, but we were already under pretty heavy load from the API nodes screaming “where did the DB go?!” so we just waited it out at that point.

In discussing this whole thing with Paul, he mentioned that he was setting up a Mongo RS for his most-excellent Where’s It Up service and asked me to take a look at his RS config.

Paul has lots of servers in lots of places, so he set up MongoDB nodes on three of them: Washington, San Antonio and Montreal. He wanted Washington to be the primary whenever possible, though, so he set up an additional arbiter on the same box (but different port) in Washington. So, now, his RS had 4 votes: two in Washington, one in San Antonio, and one in Montreal. This is not immediately obvious, but let’s say that Washington were to go down. San Antonio and Montreal would say “we each have one vote. That’s two votes. Out of four. We’re not a majority!” and they would demote themselves to secondaries, waiting for Washington to be restored. The solution is to remove the arbiter. It’s one less vote, and Washington doesn’t hold two. Now if any node goes down, the other two each get a vote (2/3, a majority), and the election can proceed as intended.

Hopefully this was easy to follow without illustrations or other, specific configuration data. If not, please comment, and I’ll help however I can. Obviously, this is not meant as a guide to configuring RS elections, but more of an anecdotal guide to not-configuring-your-RS-improperly. Don’t make my mistakes. (-:

Berliner Weiße

I think this is the first piece I’ve written on my blog that is tagged only “beer”; apologies to my readers who don’t care about such things (there are feeds for PHP and Web as well, if you’d prefer to avoid the occasional post on beer geekery).

I love a good berliner weiße beer. For those of you that haven’t had the pleasure of enjoying a glass, it’s a very light and refreshing, sour and acidic, low alcohol beer. It’s as acidic as lemonade, and low enough in alcohol that the Germans even occasionally refer to it as children’s beer.

I’ve found a few examples in bottles (while travelling), but it’s very rare that I find a good berliner weiße on tap, and even more rare that the one on tap is pouring properly (they’re usually under-carbonated, really yeasty, and they pour all foamy). I prefer mine straight (“ohne schuss”), but they’re traditionally (at least for some values of traditional) consumed mit schuss — that is, with either raspberry (“himbeersirup”) or woodruff (“waldmeistersirup”) syrups to balance the lactic, yogurty sourness of the berliner weiße base with sweet fruity flavours. If you like sour, I highly recommend you try it all three ways, if you’re ever given the chance.

A few years ago, before I’d ever even had my first taste of berliner weiße, I was listening through Jamil Zainasheff’s radio show wherein he described all of the different BJCP styles, and gave hints on how to brew each of them. A few episodes were exceptionally helpful, but the one on berliner weiße really resonated with me.

In the episode, he describes the beer and how to sour it after fermentation with a lactobacillus culture, but also talks about how “some brewers” sour mash the grist to form the lactic component, and I knew I had to try this technique. (I’ve also discussed sour mashing with Will Meyers of Cambridge Brewing (last time I saw him, I thanked him for the advice, and he assured me that it was his pleasure since he had nearly no recollection of the entire weekend of the event where we discussed it (-: ), and with John Kimmich of The Alchemist in Vermont.)

As a result of this good advice, and some experimentation on my part, I recently won a gold medal in competition with my berliner [style] weiße (the sour raspberry version of the same beer also won a silver).

I’m about to dive deep into beer nerdery here, so please feel free to stop reading at any time, but if you’re interested in my sour mashing (at home) technique, please read on. I’ve posted my berliner weiße recipe on my site, and last year I posted some photos on Flickr. Here we go…

The sourness in my berliner weiße comes completely from the sour mash. In most other sour beers (such as lambics, flanders red, gueuze, etc.), the sour components are yeast- and bacteria-derived after the boil as part of the fermentation process. In mine, all of the lactic sourness is in the beer before it’s boiled.

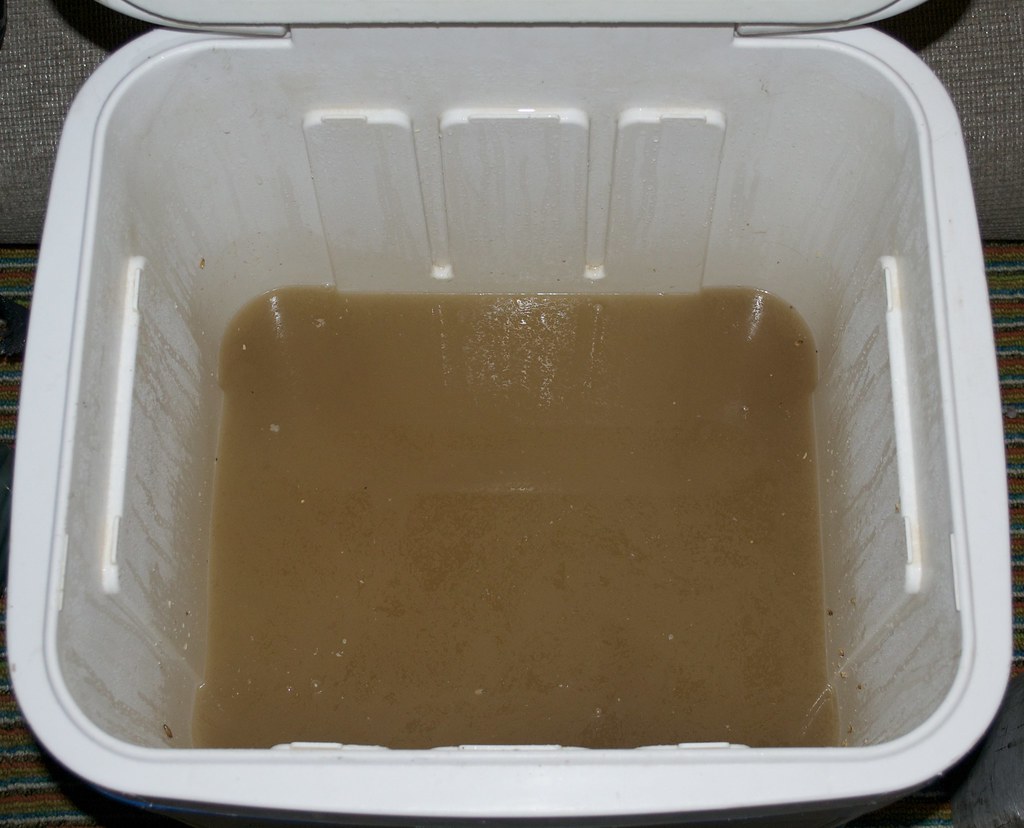
The mash was mostly normal, but I kept it very thick. More on this later, but I added water over the next couple of days to help control the temperature, so thicker is better. Luckily, this is such a low-gravity beer that it’s easy to make a thick mash without it being “too thick” for efficient conversion. I let the mash convert fully, but instead of lautering into the kettle, I just cooled it down to around 40°C, which is close to the optimal temperature to grow lactobacillus.

Once it has cooled down to ~40°C, I added a pound of unmilled 2-row malt and stirred it in. This was instead of using a lactobacillus culture, because grain contains natural lactobacillus on the husks. On a previous batch, I’d milled the grain that I added post-conversion, but this introduced a *lot* of starch into the finished beer. This doesn’t matter too much, but it made… shall we say “digestion”… difficult. (-:

With the extra pound of 2-row stirred in, and the undrained mash sitting at around 35°C, I flooded my mash tun with CO2 (from a tank), sealed it up (my mash tun is a cooler, so it holds temperature pretty well), and put it in a warm place.

In my experience, you’ll want to taste the mash every 8 hours or so to see how it’s progressing. Every time you do so, you should measure the temperature, and if it’s much below 35°C, add some boiling water and stir to get the temperature back up to the range where the lacto is most healthy. Remember to flood the tun with CO2 again after you’ve tasted and stirred.

You probably won’t want to taste the mash. It smells horrible. Really horrible, but there’s really no other way to test it that I know of. (If you’ve ever thought that it might be an OK thing to leave your freshly-used mash tun for a day or two before you clean it out, you know the horrible smell I’m describing.) You could probably measure the pH of the liquid and consider it “done” when it gets low (acidic) enough. Really, though, you should taste it. It won’t hurt you, and it’s good to know what the components of your beer taste like. To be honest, it tastes much better than it smells.

The reason I suggested a thick mash, above, is that these boiling water additions (to get the temperature back up to ~35°C) will thin out the liquid. If you’ve accounted for this, it’s fine. You could also use a more active heating method (such as heating the whole thing up in a pot, or drawing off some of the liquid and boiling that), but the infusion technique seems to work pretty well for me.

Personally, I sour the entire mash: grain and liquid. Some brewers will sour part of the liquid from the mash, and blend it back to the unsoured portion of the (refrigerated or pasteurized-by-boiling) mash liquor to get an exact blended flavour. This technique probably works just fine, but the full-sour method worked for me, so I just went with that.

The reason I flood my mash tun with CO2 is that the lactobacillus works anaerobically — that is without oxygen. I’ve heard that keeping oxygen out of your wort will promote the growth of lactic acid (and other lacto-derived components), but will prevent the “bad bugs” from taking over your wort. I haven’t had much experience with “bad bugs” in this process, myself, but I have noticed that the mash gets a lot less ugly if I’m more zealous with my application of CO2 to reduce oxygen in the mash tun during souring.

The mash after 48h

After around 48 hours (in my experience), at over 30°C, tasted every 8 hours or so, the mash will be soured enough to resume brewing.

I recirculated and ran the liquid from the mash into my kettle, as normal. I heated the wort to boiling as normal, except, since this will be a short boil, I put my immersion chiller directly into my kettle right from the start (I normally add it with 15 minutes left in the boil, to heat-sanitize). Be very careful with this wort as it climbs to the boiling point. It will boil over, and it will do so spectacularly, if you’re not attentive.

Hot break—or whatever it is

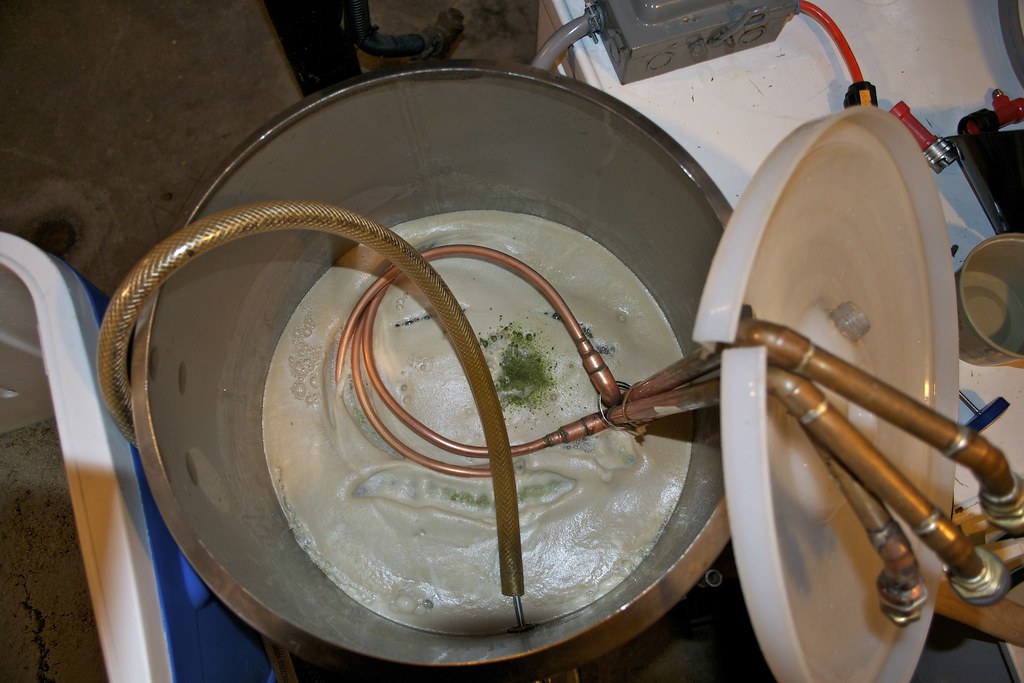
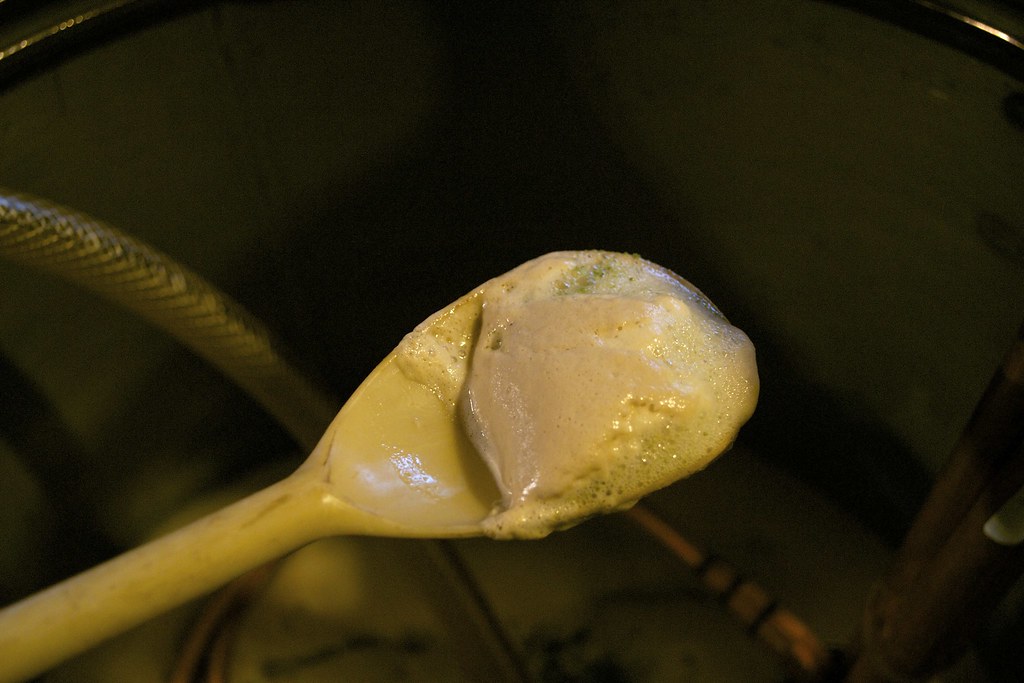
For some reason (perhaps starch or protein from the unconverted, additional, souring malt), the hot break foam on this wort is unlike any other I’ve ever seen. It is thick and gelatinous. It’s almost like meringue. The hop addition stayed completely on top of the foam until I stirred it in.

Meringue-like foam

Traditionally (again, for some value of traditional) berliner weißes are either boiled for a very short amount of time, or not boiled at all. I decided to go for a 15 minute boil to arrest (kill) the lactobacillus and to sanitize my chilling equipment.

After boiling, I fermented normally with a clean ale yeast (WY1056 or WLP001 work just fine). It’s a low-gravity beer, so it ferments out very quickly (even though it’s far more acidic at this point than most other worts you’d attempt to ferment). It’s super ugly going into the fermenter, and not much prettier when fermentation is complete (a very few days later). I can go from grain to glass (including two days of mash-souring) and one night of chilling and forced carbonation in just six days.

This is the ugliest beer I make

Not much prettier after fermenting

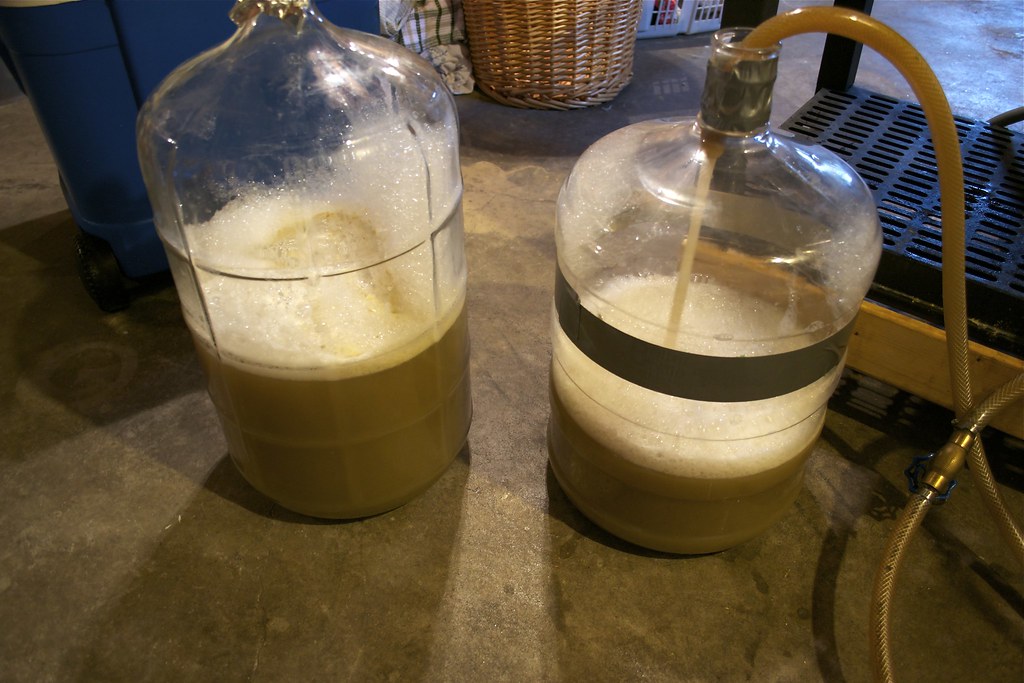
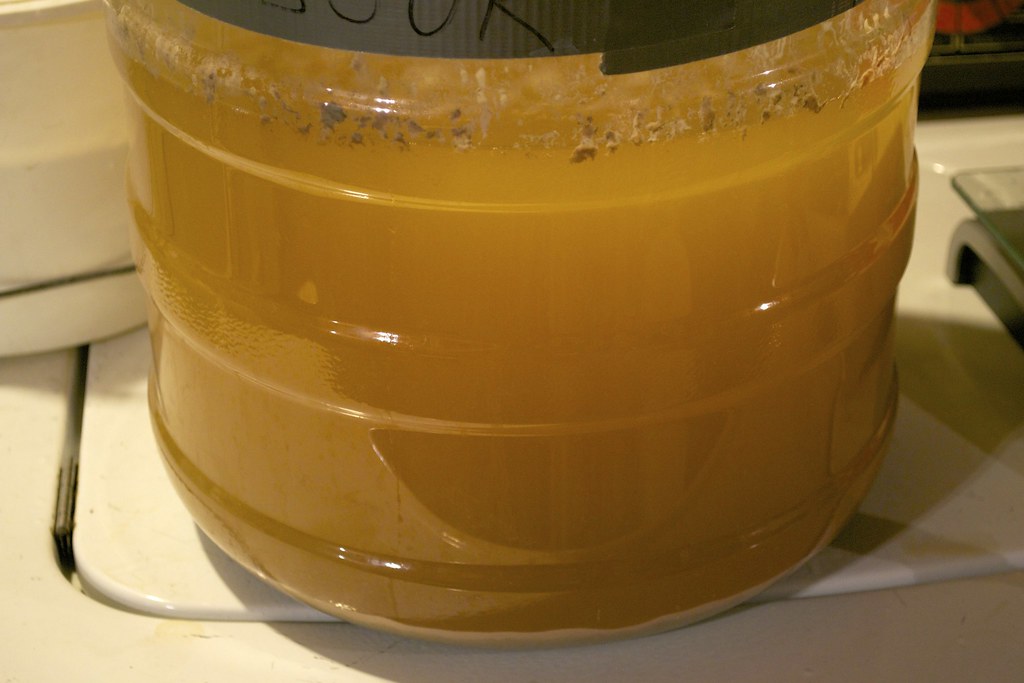
One of the nice things about using the clean-yeast, sour-mash technique is that post-boil, this beer can be treated mostly just like a normal ale. You don’t have to worry about it “infecting” your equipment because it’s just acidic; it’s not actually still full of lactobacillus because we killed that off in the boil.

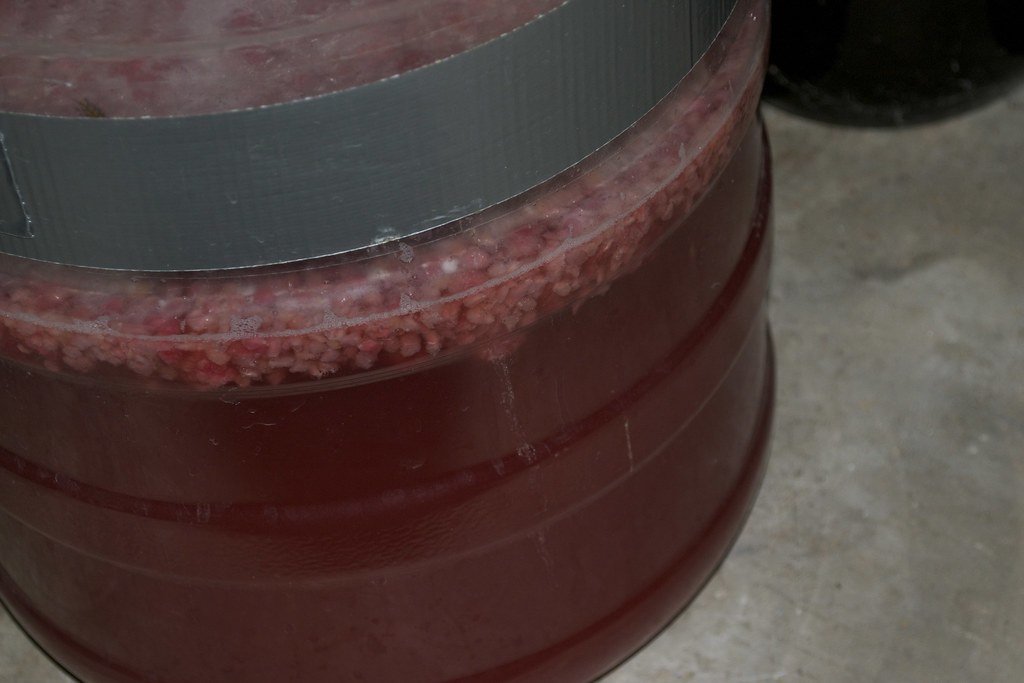
This past year, I wanted to try making my berliner weiße into a fruit beer. The previous summer (when they were at their peak), I went to the market and bought a kilogram of fresh raspberries and froze them. After fermentation was complete, I racked half of the beer onto the kilo of raspberries (still frozen), and let them sit there around for 10 months (I didn’t intend to leave it on the fruit for so long, but life got complicated). By the next morning, the beer had taken most of the colour from the berries, and left them white (and the beer red). I think the acidity of the finished beer prevented further infection that would normally take place from unpasteurized fruit.

Red beer

When you’re done, you’ll have the most delicious, most refreshing, sour-like-lemonade, lawnmower beer that you can imagine — at least if you like that type of thing. If you’re really lucky, you might even end up with a gold medal.

Update: James from Basic Brewing Radio was kind enough to have me on his show (the July 26, 2012 episode) to discuss this article. Check it out.